 EN


Installing a Vacuum Gate Valve correctly starts with understanding the system it will serve. The valve must match the vacuum level, process conditions, pipe connection, and operating pattern, while fitting the available space. Careful planning helps prevent leaks, binding, contamination, and difficult maintenance. Treat the Vacuum Gate Valve as part of the chamber and piping assembly, not as an isolated component.
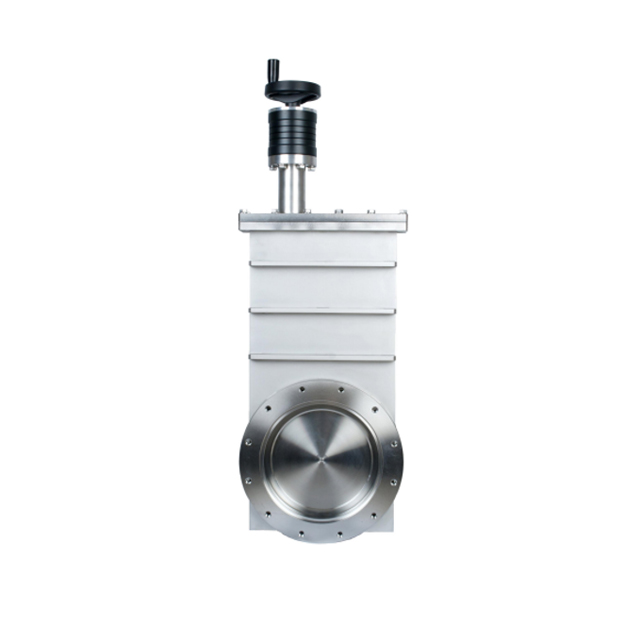
Before work begins, review the equipment documentation and confirm the installation requirements with the system design. A Vacuum Gate Valve may be used to isolate a chamber, control access between process zones, or support service work, and each duty affects the installation choices. Check the specified direction, allowable loads, seal materials, and actuator arrangement so the installed valve performs as intended.
Vacuum Gate Valve Installation Planning
Confirming service and operating conditions
Define the operating pressure range, process gases, temperature, and expected cycle frequency before selecting the installation position. These conditions determine whether the Vacuum Gate Valve materials and seals suit the application. Consider whether the system handles corrosive vapors, condensable substances, or particles, because contamination can affect sealing surfaces. Documenting the duty also gives maintenance teams a clear basis for inspection and replacement decisions.
Check the valve specification against the chamber and line requirements rather than relying on nominal pipe size alone. Confirm the Vacuum Gate Valve connection standard, flange dimensions, clear opening, and sealing interface. Verify that the selected model’s pressure and temperature limits cover normal operation as well as foreseeable process states. If the line experiences thermal change or vibration, identify those loads before finalizing supports and orientation.
Choosing location and orientation
Choose a position that allows the gate to move through its full travel without obstruction and leaves room for the actuator, wiring, and service access. A Vacuum Gate Valve installed too close to a wall, elbow, or adjacent component can complicate inspection and removal. Follow the manufacturer’s guidance on mounting orientation, especially where gravity, actuator weight, or process deposits may influence movement.
Plan the surrounding layout so operators can see the valve state and reach controls safely. Keep the Vacuum Gate Valve away from avoidable heat sources, impact hazards, and locations where liquids or debris can collect. Support nearby piping independently when needed; the valve should not carry loads caused by misaligned or unsupported pipework. Leave enough clearance to inspect connections and access seals during planned maintenance.
Preparing the System and Making Connections
Maintaining cleanliness and alignment
Vacuum sealing depends on clean, undamaged mating surfaces. Before fitting the Vacuum Gate Valve, inspect flanges for scratches, dents, residue, and foreign material, then clean them using a process compatible with the system. Keep protective covers in place until assembly is ready. Avoid touching sealing faces with bare hands, and prevent lint, metal chips, or cleaning-agent residue from entering the chamber.
Bring the pipe ends into alignment without forcing the valve body into position. Forcing a Vacuum Gate Valve between angled flanges can create stress, distort the connection, or interfere with gate travel. Check that bolt holes and sealing faces meet naturally, then tighten fasteners evenly in an appropriate sequence and to the specified requirements. Use compatible gasket or seal components and avoid adding materials not approved for the application.
Managing supports, seals, and utilities
Review the connection method and all required sealing elements before assembly. A Vacuum Gate Valve may use a particular flange interface or sealing arrangement, so confirm the correct parts and their orientation in the documentation. Ensure that support structures do not obstruct access or place bending loads on the assembly. Where the valve has electrical, pneumatic, or other utilities, route them to prevent tension, abrasion, and interference.
Install utility connections only after verifying their ratings and control requirements. The Vacuum Gate Valve actuator should receive the correct power or supply conditions, and cables or lines should have suitable strain relief. Confirm that control signals correspond to the intended open and closed states. Keep utility routing clear of moving components, and make provisions for isolation before service where the system design requires it.
Commissioning and Verifying Reliable Operation
Testing movement and control
Before introducing the process, operate the valve through its specified travel under the conditions allowed by its documentation. A Vacuum Gate Valve should move smoothly and reach its end positions without unexpected noise, obstruction, or control errors. Check local indicators and remote signals together, then verify that interlocks respond as designed. Do not force the actuator or bypass protective controls to overcome a movement problem.
Confirm that the Vacuum Gate Valve is installed in the intended orientation and that surrounding parts remain clear throughout travel. Where an actuator has adjustable settings, use only documented procedures and limits. Record the initial operating observations, control configuration, and any commissioning adjustments. This record supports later troubleshooting by showing whether a change developed after installation or was present from the outset.
Leak checks and maintenance readiness
Carry out leak testing using the method and acceptance criteria specified for the system. A Vacuum Gate Valve connection can leak because of damaged surfaces, incorrect seal placement, uneven tightening, or pipe strain, so assess the complete joint rather than the valve alone. If a leak is detected, isolate the equipment safely and correct the cause; repeated tightening without diagnosis may damage components.
Before handover, establish an inspection plan based on service severity, cycling, and process cleanliness. Include the Vacuum Gate Valve in system documentation with its location, connection details, actuator information, and maintenance access needs. Train relevant staff on status indication and isolation procedures. Clear records and accessible installation make it easier to distinguish normal wear from contamination, misalignment, or a change in operating conditions.
FAQ
How should the valve orientation be chosen?
Use the orientation specified for the model and application, then confirm actuator clearance, gate travel, and service access. The Vacuum Gate Valve should not be positioned where piping loads or process deposits impede movement. Review the equipment instructions before assembly, particularly if the installation differs from the typical configuration.
What should be checked before connecting the valve?
Confirm matching connection standards, clean and undamaged sealing surfaces, correct seals, and naturally aligned pipe ends. Check that the Vacuum Gate Valve is suitable for the system’s pressure, temperature, and process media. Prepare the work area to keep particles and residue away from vacuum-facing surfaces.
How can installation problems be reduced?
Plan access and supports, follow specified assembly procedures, and verify movement, controls, and leak tightness before process operation. Record the results for future reference. When a Vacuum Gate Valve does not move correctly or a leak appears, stop and investigate the underlying cause rather than forcing operation or making undocumented adjustments.